

Showing posts with label food. Show all posts
Showing posts with label food. Show all posts
Saturday, August 3, 2013
Why Buy Milk? Make Your Own Almond Milk
If you are like me, I buy coconut milk or almond milk when I go get groceries. I use it for baking and mostly my smoothies! Over time, it adds up. I decided that making my own milk would be much more rewarding, healthier, and relaxing. I have had homemade almond milk before but I have never made it myself. It did take about 15 minutes but it is a great stress relief (when you're squeezing the milk out).
Monday, July 29, 2013
Vegan Macadamia Lace Cookies
It is time for some yummy cookies! These macadamia nut thin cookies are delicious and especially for being vegan. Try making them at home :) they are great for adding to ice cream for a nice crispy sweet treat or just enjoying on their own.


Saturday, May 18, 2013
Eating Out as a Vegan
Many of you may or may not know that I (, Karel) started eating vegan at the end of March. Why vegan? Before, it was for health. Now, it is because I think all
beings are equal and humans are not superior. To me vegan is
non-violence towards all beings. This also means inclusive and not
hurtful words, being kind at heart, and being a loving person. I feel
very passionate about being equal towards all beings and I think vegan
is how I can encompass this belief.
I have recently realize how difficult it is to eat out at restaurants. Not because people don't offer vegan food (they do, almost always), but people are so closed minded about it. So here are some ways to help all you vegans out there eat at yummy restaurants.
What have you experienced when going out to eat? What do you tell the waiters and waitresses (vegan or allergies)? Have you had any bad (or positive!) experiences when going out?
This post is written by Karel.
Adapted from:
Oh She Glows
Happy Cow
Yelp
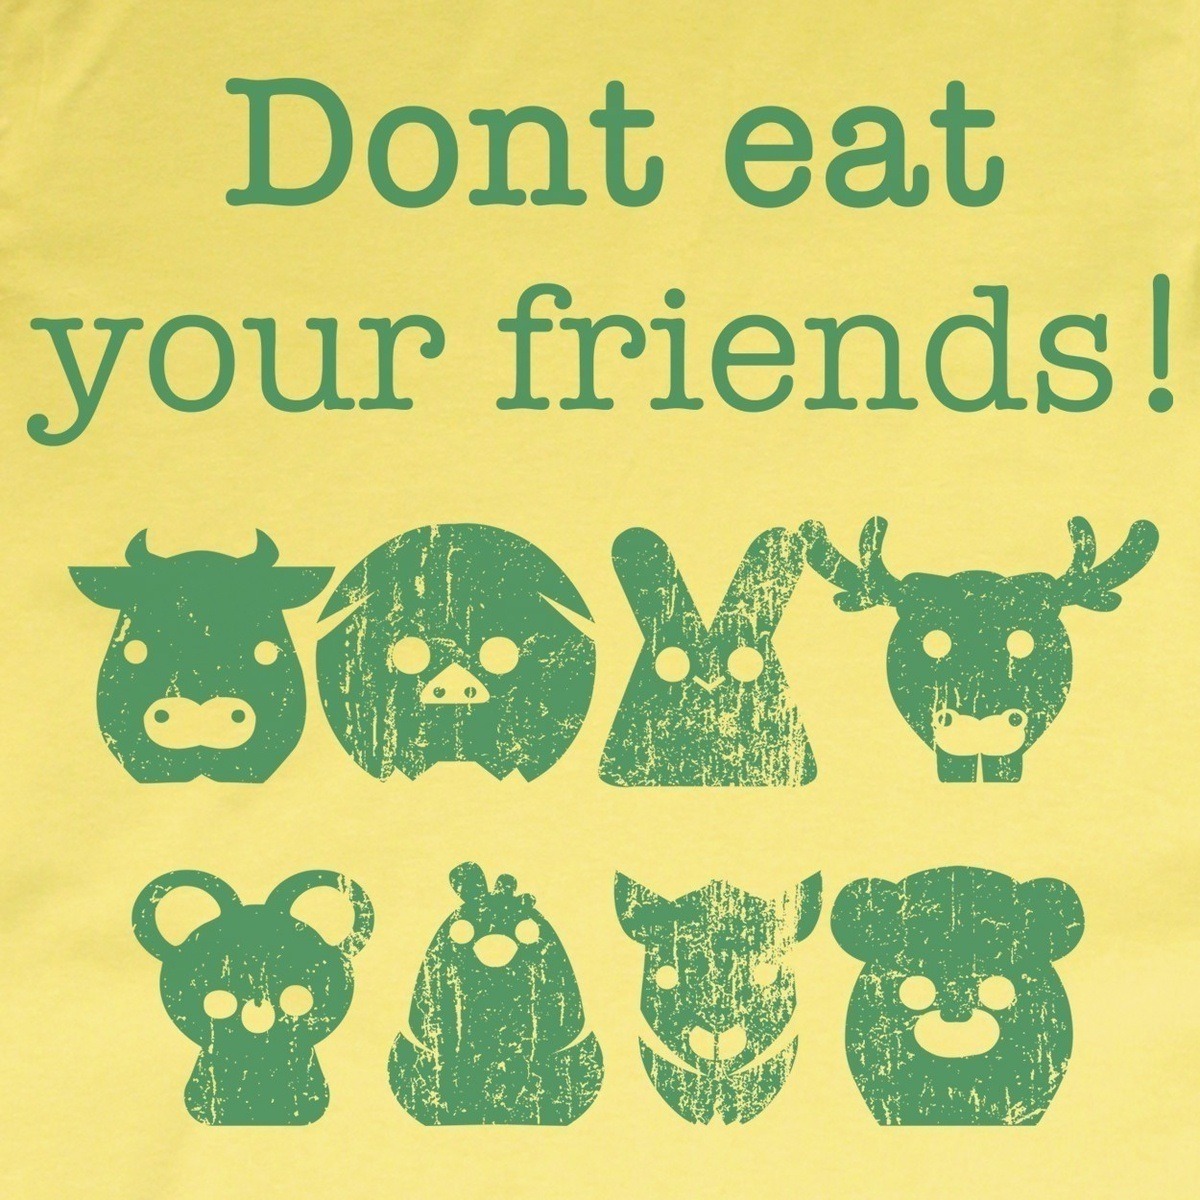
Don't Eat Your Friends Image
I have recently realize how difficult it is to eat out at restaurants. Not because people don't offer vegan food (they do, almost always), but people are so closed minded about it. So here are some ways to help all you vegans out there eat at yummy restaurants.
- Be prepared. Check out the menu before hand and write down what you want! This will ensure that you will definitely have something to eat.
- Check out Happy Cow. They have a lot of restaurants on there to show what are vegetarian and vegan friendly!
- Call them. Ask questions before you actually go it. I find that waiters and waitresses get impatient with me. Realize that they have other people to wait on. Do your homework and find out before you go in.
- Don't forget to check out the sides. Sometimes that is your best option. For example, today I ordered a side of fruit, a side of veggies, and a side of potatoes. I was full and it was all vegan!
- Check out Yelp too. If you type in vegan, a bunch of results will show up. Click on the restaurant, and search vegan again (it's in the middle of the page). You can see the person's comment that had the word vegan in it. This really helps me figure out what to order.
- Regardless of number 3, ask questions. It doesn't hurt to ask and you can get a clear answer right away.
- Sometimes it is just better to tell them that you are allergic to mean, dairy, and eggs. They are more careful when preparing your food when allergies are involved.
- Eat before (if you know they really do not have anything) or bring some snacks.
- Don't forget about the butter! Ask if they cook with butter.
- Most importantly, be polite and nice.
What have you experienced when going out to eat? What do you tell the waiters and waitresses (vegan or allergies)? Have you had any bad (or positive!) experiences when going out?
This post is written by Karel.
Adapted from:
Oh She Glows
Happy Cow
Yelp
Don't Eat Your Friends Image
Saturday, May 4, 2013
Raw Chocolate Cookie Dough Balls
This is a great recipe because it's raw, vegan, gluten free, healthy, and super satisfying! Everyone likes a yummy treat once in a while, but those strawberry poptarts aren't going to do much for your health. Instead of empty sweet calories, it's more awesome to make something that your body truly craves being rich in living minerals, enzymes, and energy. You don't have to feel guilty about eating these cookie dough balls, so enjoy them and keep backup for when you want an awesome lightly sweet snack. Karel and I made these last night and they were delicious!

Directions
1. Blend the cashews and oats in a food processor until a flour consistency is reached. Try to blend it as much as possible (unless you want more chunky cookie balls)
2. In a bowl add your cashew oat bled with the vanilla, salt, and honey. Stir with a wooden spoon, and then add the cacao nibs once mixed thoroughly
3. Taste your creation! Add a little water to the mixture so that when you roll the balls it will help them stick together. You can also add more honey if you would like it sweeter
4. Roll the mixture into balls or whatever shape you would like
5. Roll the balls in the cacao powder (cacao is pretty strong and can be a bit bitter, so test how much you want on the outsides of your balls)
6. ENJOY!
Try making these and let us know what you think :)
This post is written by Michael .
Adapted from:
The Earth Diet Recipe & Photo
http://www.theearthdiet.org/

Recipe
2/3 Cup Raw Rolled Oats (can buy gluten free if desired, or even used soaked whole groats)
2/3 Cup Raw Cashews
1 tsp Vanilla Extract
2 tsp Honey
1 tsp Himalayan Salt
2 Tbsp Cacao Powder
2 Tbsp Cacao Nibs
Extras: add coconut flakes, goji berries, dates, or maca to spice these up more :)
Directions
1. Blend the cashews and oats in a food processor until a flour consistency is reached. Try to blend it as much as possible (unless you want more chunky cookie balls)
2. In a bowl add your cashew oat bled with the vanilla, salt, and honey. Stir with a wooden spoon, and then add the cacao nibs once mixed thoroughly
3. Taste your creation! Add a little water to the mixture so that when you roll the balls it will help them stick together. You can also add more honey if you would like it sweeter
4. Roll the mixture into balls or whatever shape you would like
5. Roll the balls in the cacao powder (cacao is pretty strong and can be a bit bitter, so test how much you want on the outsides of your balls)
6. ENJOY!
Try making these and let us know what you think :)
This post is written by Michael .
Adapted from:
The Earth Diet Recipe & Photo
http://www.theearthdiet.org/
Saturday, April 13, 2013
Cauliflower Crust Garlic Breadsticks

I found this recipe on Tumblr and decided to try it since I have never had cauliflower. I love trying new things and this recipe was yummy!!!

Ingredients
- 1/4 of a large head of cauliflower
- 1 Tablespoon olive oil
- 2 cloves garlic, grated or minced
- 1 Tablespoon ground flax seed + 3 Tablespoon water (OR 1 egg, lightly beaten for non-vegans)
- 4 oz your choice of soy cheese, divided (or mozzarella cheese, grated for non-vegans)
- 1/2 teaspoon dried Italian herb seasoning, divided
- 1 pinch each salt and pepper
- cooking spray (I just used oil on a paper towel)
- marinara sauce for serving (for a healthy option, check and make sure there is no added sugar!)
Directions


- Preheat the oven to 350 degrees F and line a 9 by 5-in loaf pan with parchment paper so that the excess paper hangs over the sides; lightly spray or oil the parchment paper with cooking spray.
- If you are going to use flax seed + water instead of an egg, put together the two in a small cup. Let it sit until needed, mixing occasionally. It will turn into an "eggy" substance. (See first top pic)
- To "rice" the cauliflower, grate it on a cheese grater. I put it in my food processor using the grating part. You should have about 1 1/2 cups (lightly packed) of riced cauliflower. Put the riced cauliflower into a microwave safe bowl and microwaved (uncovered) until softened, about 6-8 minutes, stirring occasionally (do NOT add water or anything else); cool slightly. (See second top pic)
- While cauliflower cooks, heat the oil in a small skillet over low heat; add the garlic and cook until fragrant, about 30 seconds to 1 minute, stirring constantly; cool slightly.
- To the bowl with the softened cauliflower, add the garlic, flax seed mixture (or egg), 3/4 of the cheese (reserving 1/4 for topping later), 1/4 teaspoon of the dried Italian herb seasoning (reserving 1/4 teaspoon for topping later), and a pinch of salt and pepper. Stir to combine and spread into prepared loaf pan. Please Note: I am a poor college student and do not own such pan. I used a circle glass pan. I don't think it worked very well but it's up to you. Use what you have.
- Bake until the loaf is set and starting to turn golden, about 20 to 30 minutes. Line a baking sheet with a piece of parchment paper; use the parchment paper to life the loaf out of the loaf pan and carefully flip it over onto the lined baking sheet (so the bottom is on top). Bake until golden, about 10 minutes. (NOTE: I took mine out earlier because it was 8PM and was extremely hungry. Make sure its golden, or it will be somewhat soggy like mine) (See last top pic)
- Sprinkle the cheese on top along with the remaineing 1/4 teaspoon dried Italian herb seasoning. Put into oven until cheese has melted and golden in spots. Serve hot or warm.

Have you tried this recipe? Let us know what you think of it! What did you change or add?
This post is written by Karel.
Adapted from:
This recipe is not mine, I cannot find the original. If you know where the original recipe is please let us know! I have it on an old recipe card.
All pics are originally mine.
Saturday, March 30, 2013
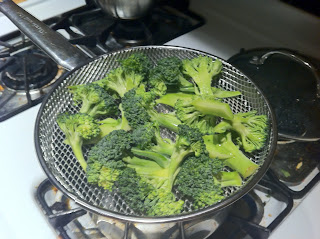
Super Fast Creamy Avocado Pasta and Steamed Broccoli
I have had this recipe for a very long time. I recently started eating vegan and this recipe was perfect after a long day of classes and wanted something quick. If you like garlic and pasta and avocado, this is perfect for you! I would definitely make this recipe again. 5 Stars!

Creamy Avocado Pasta
Ingredients:

Directions:
1. Make your pasta like you usually do. Boil water, put pasta in, wait, drain. You know the drill. (During this, I had my broccoli steaming on top!)
 2. While your pasta is cooking, make the sauce. Put the garlic cloves, lemon
juice, and olive oil into a food processor. Process until smooth. Then add the pitted avocado, basil, and salt. Process until smooth and
creamy.
2. While your pasta is cooking, make the sauce. Put the garlic cloves, lemon
juice, and olive oil into a food processor. Process until smooth. Then add the pitted avocado, basil, and salt. Process until smooth and
creamy.
 3. When pasta is done cooking, drain and rinse in a strainer and
place pasta into a large bowl. Pour on sauce and toss until fully
combined. Garnish with lemon zest and black pepper. Serve immediately.
3. When pasta is done cooking, drain and rinse in a strainer and
place pasta into a large bowl. Pour on sauce and toss until fully
combined. Garnish with lemon zest and black pepper. Serve immediately.
Makes 2 servings.
Please note: This dish does not reheat well due to the avocado in the sauce. Please serve immediately.
I added extra seasoning and steamed broccoli to this recipe. What would you have as a side or add to the dish?
This post is written by Karel.
Adapted from:
My own original pics
OhSheGlows Original Recipe

Creamy Avocado Pasta
Ingredients:

- 1 medium sized ripe Avocado, pitted
- 1/2 lemon, juiced
- 1-3 garlic cloves, to taste (I used 4 and it was super garlicky, don't do it.)
- 1/2 tsp salt, or to taste
- ~1/4 cup Fresh Basil
- 2 tbsp extra virgin olive oil
- 2 servings/6 oz of your choice of pasta (I used quinoa elbows!)
- Freshly ground black pepper, to taste
- garlic powder to
- Half broccoli head
Directions:
1. Make your pasta like you usually do. Boil water, put pasta in, wait, drain. You know the drill. (During this, I had my broccoli steaming on top!)


Makes 2 servings.
Please note: This dish does not reheat well due to the avocado in the sauce. Please serve immediately.
I added extra seasoning and steamed broccoli to this recipe. What would you have as a side or add to the dish?
This post is written by Karel.
Adapted from:
My own original pics
OhSheGlows Original Recipe
Saturday, March 23, 2013
Nutritional Food Labels: Look out!
The great thing about food in todays day and age is that you can see a clear list of ingredients on the label. Although this is great, sometimes it can be hard to understand certain ingredients, or to even identify where they come from. A good rule is that if you can't pronounce something, you probably shouldn't be eating it, but I have come up with a nice list of ingredients to watch out for in order to help protect your health and well-being :)
Also just know that anything that happens in the manufacturing process does not need to be listed on the food label. For example, baby carrots are dipped in bleach to maintain their bright colors, but they don't have to list bleach on the ingredients list because it is part of the manufacturing process. Loop holes I tell you!

Top ingredients to look out for on food labels:
This isn't a comprehensive list of everything, but a great starting point to help you figure out what is in the food you are eating. If you are unsure about certain ingredients or cannot pronounce them, then it is probably best to avoid it. Eat food in it's most natural state, or make it yourself. Stick to the outer edges of the grocery store, because this is where the freshest and healthiest foods are.
Thanks for reading! Please comment with any other key ingredients that you think may be good to know! :)
This post is written by Michael.
Adapted from:
Personal Knowledge
Ingredients to Avoid
Image 1
Also just know that anything that happens in the manufacturing process does not need to be listed on the food label. For example, baby carrots are dipped in bleach to maintain their bright colors, but they don't have to list bleach on the ingredients list because it is part of the manufacturing process. Loop holes I tell you!
Top ingredients to look out for on food labels:
- Hydrogenated Oils (ex: Hydrogenated Oil, Partially Hydrogenated Oil, Vegetable Shortening, Shortening) - The problem with hydrogenated oils is that they help preserve the shelf life of a product, but that means that it also lowers your life span as well! Avoid all hydrogenated oils because they are a trans fat. Also it is good to know that if a food has less than 0.5g per serving of trans fats, they don't have to list it on the ingredient. (products such as skippy peanut butter and circus animal cookies have hydrogenated oils)
- MSG (ex: Monosodium Glutamate, Autolyzed Yeast, Textured Vegetable Protein, Natural Flavorings, Sodium Caseinate) - MSG is very addictive and is harmful to our health. It can cause headaches, nausea, and weakness in the body, as well as not allowing us to absorb the full spectrum of nutrients from foods. A good example of a product that uses it is flaming hot Cheetos. Now I can understand why my cousin always wants to buy them every time we go to the grocery store. MSG has also been popularly used at a lot of Chinese restaurants, so make sure to ask them first. Also know that it doesn't always show up as just MSG on the label, check my ()'s above for all the ingredients it can be found in.
- High Fructose Corn Syrup (ex: High Fructose Corn Syrup, Fructose, Corn Syrup, Corn Syrup Solids) - Corn syrup is genetically modified corn used for it's sweetening abilities at a low cost. Our bodies basically don't even recognize what it is and it can disrupt our hormones, and imbalance our bodies fat. It is incredibly sweet and is in EVERYTHING now a days. Avoid it at all costs because it increases your risk for diabetes, stroke, heart disease, and cancer.
- Sugars/Artificial Sweeteners (ex: sugar, evaporated cane juice, fructose, sucrose, aspartame, sucralose, rice syrup, saccharine, nutrasweet, sweet n' low, splenda, equal, sorbitol) - The issue with sugar is that is is overly processed, bleached, and not in it's natural state once it reaches that box of cookies you so desperately love. It acts as a poison in the body and can disrupt kidney function and some have even been linked to cancer. Above I have listed many forms that sugar can take on an ingredients list. Most things ending in -ose, are a sugar derivative. Replace conventional sugar in recipes with raw Agave, Molasses, Coconut Sugar, Honey. Theses are all much healthier and more in their natural state.
- Artificial Colors/Dyes (ex: Red #40, Blue #1) - These have been linked to allergic reactions, asthma, and other health issues. They are usually derived from coal-tar derivatives in order to help enhance the color of food and make it more visually appealing.
- Benzonate Preservatives (ex: TBHQ, BHT, BHA) - These preservatives help to keep fats from going rancid in food, but it does come with a price. These have been linked to tumors, asthma, hyperactivity, and estrogen imbalance.
- Bleached Flours (ex: bleached wheat flour, bleached white flour) - Bleached flours are stripped of all nutrients and are only empty calories. Look for foods made with flours that are unbleached and have whole grains. These will be more beneficial to your health!
This isn't a comprehensive list of everything, but a great starting point to help you figure out what is in the food you are eating. If you are unsure about certain ingredients or cannot pronounce them, then it is probably best to avoid it. Eat food in it's most natural state, or make it yourself. Stick to the outer edges of the grocery store, because this is where the freshest and healthiest foods are.
Thanks for reading! Please comment with any other key ingredients that you think may be good to know! :)
This post is written by Michael.
Adapted from:
Personal Knowledge
Ingredients to Avoid
Image 1
Saturday, February 16, 2013
Banana Nut Love Pancakes
Today I am sharing an awesome recipe for banana nut pancakes. They are simply delicious and can even be made vegan. Karel and I have made these many times and just love them! It is an easy recipe to follow, and we hope you will enjoy them! <3

Ingredients:
-1 Cup flour (you can use wheat, all purpose, or whatever you choose)
-1 tbsp sugar (you can use white sugar, but I recommend coconut sugar or agave)
-2 tsp baking powder
-1/4 tsp salt
-1 egg, beaten (you can substitute for 1 tbsp flaxseed + 1 tbsp water)
-1 cup milk (you can substitute for almond milk or whatever you choose)
-2 tbsps vegetable oil
-2 ripe bananas
-1 cup chopped walnuts (or any other nut)

Directions:
-Combine flour, sugar, baking powder, and salt. In a separate bowl mix egg, milk, vegetable oil, and banana (you want to mash the banana with a fork thoroughly)
-Stir the flour mixture into the banana mix, it should be a bit lumpy
-Heat a nonstick pan on medium heat with oil. Scoop the mixture with a big spoon and try to use about 1/4 cup for each pancake. Wait for the outer edges to start to bubble before flippingCook them until golden brown on both sides
-Enjoy & top with whatever you would like! ENJOY!


This post is written by Michael.
Adapted from:
own images

Ingredients:
-1 Cup flour (you can use wheat, all purpose, or whatever you choose)
-1 tbsp sugar (you can use white sugar, but I recommend coconut sugar or agave)
-2 tsp baking powder
-1/4 tsp salt
-1 egg, beaten (you can substitute for 1 tbsp flaxseed + 1 tbsp water)
-1 cup milk (you can substitute for almond milk or whatever you choose)
-2 tbsps vegetable oil
-2 ripe bananas
-1 cup chopped walnuts (or any other nut)
picture shows all ingredients except the sugar and milk

Directions:
-Combine flour, sugar, baking powder, and salt. In a separate bowl mix egg, milk, vegetable oil, and banana (you want to mash the banana with a fork thoroughly)
-Stir the flour mixture into the banana mix, it should be a bit lumpy
-Heat a nonstick pan on medium heat with oil. Scoop the mixture with a big spoon and try to use about 1/4 cup for each pancake. Wait for the outer edges to start to bubble before flippingCook them until golden brown on both sides
-Enjoy & top with whatever you would like! ENJOY!


This post is written by Michael.
Adapted from:
own images
Sunday, January 6, 2013
Iron Explained for Vegetarians
Your body needs iron for your blood and your brains. Iron helps make hemoglobin, which assists the transportation of oxygen through your blood into the cells in your body. If you do not get enough iron in your system, your red blood cells becomes pale and weak. This means that your blood is not receiving enough oxygen.
Cues That You May Need More Iron

The Food and Nutrition Board at the Institute of Medicine recommends the following:
Infants and Children
• Younger than 6 months: 0.27 milligrams per day (mg/day)
• 7 months to 1 year: 11 mg/day
• 1 to 3 years: 7 mg/day
• 4 to 8 years: 10 mg/day
Men
• 9 to 13 years: 8 mg/day
• 14 to 18 years: 11 mg/day
• Age 19 and older: 8 mg/day
Women
• 9 to 13 years: 8 mg/day
• 14 to 18 years: 15 mg/day
• 19 to 50 years: 18 mg/day
• 51 and older: 8 mg/day

Sources of Iron
1 cup of cooked soybeans (8.8 mg)
1 cup of cooked lentils (6.6 mg)
1 cup of cooked spinach (6.4 mg)
1 teaspoon of Spirulina (5 mg)
1 cup of cooked chickpeas (4.7 mg)
4 ounces of quinoa (4 mg)
1 cup of cooked oatmeal (1.6 mg)
This post is written by Karel.
Adapted from:
Why Do You Need Iron
Iron Requirements
Iron Sources 1
Iron Sources 2
Cues for more iron
Iron
Leafy Greens Picture
Iron Greens
Cues That You May Need More Iron
- fatigue & weakness
- inability to concentrate
- increased susceptibility to infections
- hair loss
- dizziness
- headaches
- brittle nails
- apathy
- depression

The Food and Nutrition Board at the Institute of Medicine recommends the following:
Infants and Children
• Younger than 6 months: 0.27 milligrams per day (mg/day)
• 7 months to 1 year: 11 mg/day
• 1 to 3 years: 7 mg/day
• 4 to 8 years: 10 mg/day
Men
• 9 to 13 years: 8 mg/day
• 14 to 18 years: 11 mg/day
• Age 19 and older: 8 mg/day
Women
• 9 to 13 years: 8 mg/day
• 14 to 18 years: 15 mg/day
• 19 to 50 years: 18 mg/day
• 51 and older: 8 mg/day
Sources of Iron
1 cup of cooked soybeans (8.8 mg)
1 cup of cooked lentils (6.6 mg)
1 cup of cooked spinach (6.4 mg)
1 teaspoon of Spirulina (5 mg)
1 cup of cooked chickpeas (4.7 mg)
4 ounces of quinoa (4 mg)
1 cup of cooked oatmeal (1.6 mg)
This post is written by Karel.
Adapted from:
Why Do You Need Iron
Iron Requirements
Iron Sources 1
Iron Sources 2
Cues for more iron
Iron
Leafy Greens Picture
Iron Greens
Wednesday, December 26, 2012
Tea? It's like a hug in a cup.
Michael and I have basically been sick on and off for the past three weeks. During this time, we decided that no drugs would be necessary. Actually, we never even thought about it! Why? Because tea cures. (At least, we think so.)

Why Tea Rocks
Tea has been around for thousands of years for healing, health, wisdom, and social gatherings. However, doctors do not "prescribe" it for whatever reason they may have. Tea is naturally soothing and healing to the mind, body and spirit. There are many reasons to love tea!
This post is written by Karel.
Adapted from: Tea Types and Their Health Benefits
Tea Health Benefits
Republic Of Tea
Title Inspiration
Tea gif
Disclaimer: We are not sponsored by The Republic of Tea or Lupicia. We just really enjoy their products.
Why Tea Rocks
Tea has been around for thousands of years for healing, health, wisdom, and social gatherings. However, doctors do not "prescribe" it for whatever reason they may have. Tea is naturally soothing and healing to the mind, body and spirit. There are many reasons to love tea!
- Tea has less caffeine compared to coffee. This means it is better for the heart and helps prevent cancer. But...
- Some Teas have caffeine! It is great for people like me who cannot drink coffee because gives me headaches and anxiety.
- Helps burn fat! You are basically drinking water with a little (or a lot) of flavor. Zero calories! I think yes.
- Green tea has antioxidants, more than broccoli, carrots, or spinach.
- White tea has the most anticancer properties.
- Oolong helps lower bad cholesterol.
- It boosts your immune system, boosts functioning for old age, lowers blood pressure,
 |
| Herb Tea for Detoxing |
 | ||
| Herb Tea for the Libido |
 |
| Peach Blosson Oolong |
 |
| Tea for Lifting Your Spirits |
 |
| Lupicia's White Christmas |
We love tea so much that my mom got Michael and I these cute double walled glass cups for our anniversary. So there you have it. Our little obsession over tea. Why do you like tea? What is your favorite kind? We would LOVE suggestions! (Katie...? I know you're reading this.)
This post is written by Karel.
Adapted from: Tea Types and Their Health Benefits
Tea Health Benefits
Republic Of Tea
Title Inspiration
Tea gif
Disclaimer: We are not sponsored by The Republic of Tea or Lupicia. We just really enjoy their products.
Wednesday, December 5, 2012
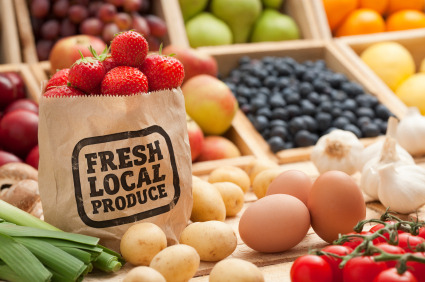
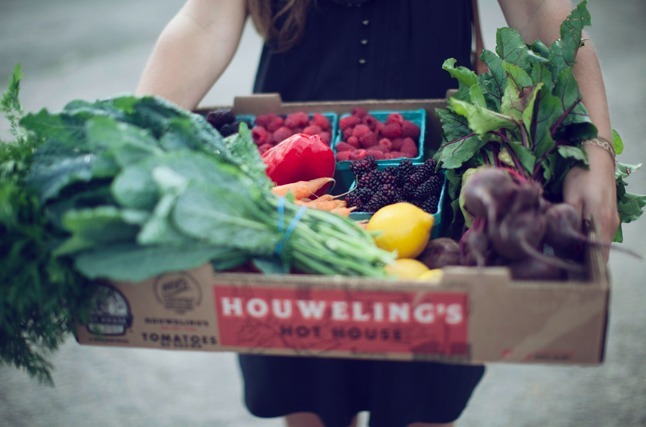
Farmer's Markets
Farmer's markets are a great way to get healthy, organic food. Michael and I go to the Farmer's Market almost every week and we love it! It is one of the oldest forms of direct marketing. You meet the guy that's growing your food! You can't do that when you go to the grocery store.
Why We Love the Market
To find your local farmers market: Use LocalHarvest. Look it up and research again in Google. Usually the farmer's markets have websites. Use it to see if they are open year round. Sometimes markets are closed due to the cold season and rain, but bigger populated areas will most likely have a year round market!
Do you go to the Farmer's Market? What is your favorite part about the market?
This post is written by Karel.
Adapted from:
LocalHarvest
Farmer's Market Box Picture
Fresh Local Produce Picture
Why We Love the Market
- It is affordable. We usually use less that $40 for food between the both of us. We get tons of greens and fruit! We love fruit. We got 7 pounds of apples for $6 once. It was great.
- You meet the farmer. If you have a question, they can answer it because they are the one that is growing their food. We talked to the persimmon guy and he told us exactly when our persimmons will be good to eat.
- Sometimes they give you free stuff. I go to a specific booth and they always give me a free tomato or onion. Sometimes if you go towards the end of the farmer's market, they give more free stuff because they want to get rid of their food.
- You can tell them how much money you have left and they will accommodate. I use this trick ALWAYS. I ask "how many zucchinis can I get for $3?" They usually give me more than I pay for because they realize I'm trying to save money as much as I can.
- Really good quality food. Obviously if you go earlier, you get the best quality because it hasn't been picked through. Regardless, I always find something I want.
- Support local farmers! You know exactly where your money is going to and supporting local farmers is the best.
- It's fun. Michael and I love walking around and seeing what they have. There is always someone selling beautiful flowers and a couple booths with crafts and pottery. You never know what you'll find!
To find your local farmers market: Use LocalHarvest. Look it up and research again in Google. Usually the farmer's markets have websites. Use it to see if they are open year round. Sometimes markets are closed due to the cold season and rain, but bigger populated areas will most likely have a year round market!
Do you go to the Farmer's Market? What is your favorite part about the market?
This post is written by Karel.
Adapted from:
LocalHarvest
Farmer's Market Box Picture
Fresh Local Produce Picture
Wednesday, November 21, 2012
"Cheezy" Pumpkin Mac and Cheez
Michael and I had a pumpkin for about two weeks and decided that we should probably make it. I haven't had mac and cheese in a really long time and I was dying to try this recipe that I discovered on Oh She Glows. Okay, it's NOT really mac and cheese because it's completely vegan. No dairy or cheese!

Roasted Pumpkin Puree
I used fresh pumpkin in this recipe. If you don't have a fresh pumpkin, you can also use one cup of canned pumpkin puree (or something like that).
Pasta
I used elbow quinoa pasta. You can use whatever you want. I made had the water boil while making the sauce.
Mac and Cheez Sauce
This post is written by Karel.
Adapted from:
Oh She Glows Recipe
my original pictures

Roasted Pumpkin Puree
I used fresh pumpkin in this recipe. If you don't have a fresh pumpkin, you can also use one cup of canned pumpkin puree (or something like that).
- Preheat oven to 370 degrees.
- Cut pumpkin into fourths. Take the seeds and stringys out.
- Place pumpkin on cookie sheet (or whatever you want to use) skin faced up.
- Bake for 1 hour or until pumpkin insides are tender.
- Let cool and scrape off pumpkin skin.
- Let pumpkin cool completely before pureeing. We used a food processor. It took a long time.
Pasta
I used elbow quinoa pasta. You can use whatever you want. I made had the water boil while making the sauce.
Mac and Cheez Sauce
- 1 tbsp & 1 tsp Earth Balance (or any butter replacer, or butter)
- 3/4 cup unsweetended Almond Milk (or coconut milk)
- 1 tbsp arrowroot powder
- 1/4 tsp garlic powder (we did a little more, we really like garlic)
- 7 tbsp nutritional yeast
- 2 tsp Dijon mustard (I thought Michael said tablespoon and I just kept squeezing the bottle. oops).
- 1 1/3 cup pumpkin puree (or canned pumpkin)
- salt and pepper, to taste

- In a bowl, whisk together milk, arrowroot powder, and garlic powder until it is not clumpy. Set aside.
- Put the Earth Balance into a pot over low-medium heat. Let it melt.
- Add bowl of milk mix into pot and mix.
- Stir in nutritional yeast, Dijon mustard, Salt and pepper. Mix until thickened.
- Add pumpkin puree and stir.
- Add cheezy sauce to noodles and enjoy!
This post is written by Karel.
Adapted from:
Oh She Glows Recipe
my original pictures
Wednesday, November 14, 2012
Baby Carrots: Not So Innocent
Fun Fact: Baby carrots are shaved down reject adult carrots that nobody wanted. Basically, back in the 80s, carrots had to have a specific color, size, and shape or else grocery stores would not accept them. Isn't that sad? Even these orange, crunchy vegetable have societal pressures to look a certain way. I recently found my love of carrots and baby carrots are great because they're so compact and cute! Until I heard about the truth...

Just a little background: Basically a farmer was so sick of the waste, that he decided to do something with the rejected carrots. He had two solutions. 1. shave them into 1 inch balls, calling them bunny balls. 2. baby carrots! Bunny balls weren't a hit but baby carrots were! So that was when the baby carrot was born.
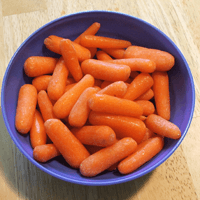 Here's the thing. These cute little healthy snacks aren't as healthy as you think. Remember how I said that carrots were rejected based on color, size, and shape? Well... To make baby carrots, the rejected carrots were ground together and bathed in chlorine to give them the bright orange color. Another way is to just cut and peel into the baby carrot shape, but again, they are bathed in chlorine.
However, in the ingredients list, it doesn't say chlorine! Why? Basically anything that happens in the manufacturing process does not need to be included in the ingredients list. There is no way to tell if there is chlorine in your organic baby carrots or not.
If you didn't know, chlorine is highly toxic. It is commonly found in household cleaners and in the air near industrial areas. Ingesting chlorine can lead to many health problems, like "sore throat, coughing, eye and skin irritation, rapid breathing, narrowing of the bronchi, wheezing, blue coloring of the skin, accumulation of fluid in the lungs, pain in the lung region, severe eye and skin burns, lung collapse, a type of asthma known as Reactive Airways Dysfunction Syndrome (RADS)" [Source].
Long story, short: Just buy organically grown whole carrots. You can easily just wash them and cut them in to sticks! Yummm.

This post is written by Karel.
Adapted from:
Why Baby Carrots Are Killing You
True Baby Carrots
Just Say No to Baby Carrots (This is a great article too!)
Just a little background: Basically a farmer was so sick of the waste, that he decided to do something with the rejected carrots. He had two solutions. 1. shave them into 1 inch balls, calling them bunny balls. 2. baby carrots! Bunny balls weren't a hit but baby carrots were! So that was when the baby carrot was born.
Here's the thing. These cute little healthy snacks aren't as healthy as you think. Remember how I said that carrots were rejected based on color, size, and shape? Well... To make baby carrots, the rejected carrots were ground together and bathed in chlorine to give them the bright orange color. Another way is to just cut and peel into the baby carrot shape, but again, they are bathed in chlorine. However, in the ingredients list, it doesn't say chlorine! Why? Basically anything that happens in the manufacturing process does not need to be included in the ingredients list. There is no way to tell if there is chlorine in your organic baby carrots or not.
If you didn't know, chlorine is highly toxic. It is commonly found in household cleaners and in the air near industrial areas. Ingesting chlorine can lead to many health problems, like "sore throat, coughing, eye and skin irritation, rapid breathing, narrowing of the bronchi, wheezing, blue coloring of the skin, accumulation of fluid in the lungs, pain in the lung region, severe eye and skin burns, lung collapse, a type of asthma known as Reactive Airways Dysfunction Syndrome (RADS)" [Source].
Long story, short: Just buy organically grown whole carrots. You can easily just wash them and cut them in to sticks! Yummm.
This post is written by Karel.
Adapted from:
Why Baby Carrots Are Killing You
True Baby Carrots
Just Say No to Baby Carrots (This is a great article too!)
Wednesday, October 31, 2012
Marinated Portobello Mushrooms
 Ingredients:
- 1 Tablespoon olive oil
- 2 Tablespoons soy sauce
- 2 Tablespoons balsamic vinegar
- 2 garlic cloves, minced
- sprinkle seasoning (I used garlic powder, onion powder, basil, oregano)
- 2 large portobello mushrooms, remove caps

1. In a ziploc bag, mix everything EXCEPT the mushrooms together. See first image.
2. Wash mushrooms thoroughly. See second image on right.
3. Place the mushrooms in bag, CLOSE tightly and shake!
4. Place in refrigerator overnight. Flip when you think it is necessary. (I did this at 9pm and flipped it over in the morning so I can cook it later that night.
5. Once you have let it marinade overnight (or for a couple hours), preheat oven to 400 degrees. Take mushrooms out and place on glass oven safe pan. (DO NOT throw away sauce!)
6. Sprinkle some sauce over mushrooms.
7. Cover with foil.
8. Place in preheated oven for 25 minutes. Flip mushrooms to other side and let sit in oven for 7 minutes.
9. Take out and enjoy!
Here is the finished product! It's delicious. We had it with pasta.

Happy Halloween!
We hope everyone stays safe and enjoy having a sugar coma! (:
This post is written by Karel.
Adapted from: myself and Michael!
Saturday, October 20, 2012
Raw Apple Cream Mini Pie

This is a recipe I created myself, and it is pretty simple yet delicious. Good for 1-4 people I would say :)
--> first off, it's gluten free, vegan, and raw, but not nut free
Tools you will need:
-blender
-food processor
-small pyrex or glass dish (the one I used was about 5-6'' in diameter)
*pre-prep: soak cashews in filtered water for 2 hours before blending!
Ingredients:
(for food processor)
-1 cup almonds
-1 cup walnuts
-1 tbsp coconut oil
-5 dates (to make it more sticky and for some sweetness--> don't forget to remove the pits!)
(for blender)
-2 cups cashews (*pre-soak 2 hours before blending)
-1/4 cup agave nectar
-1 tbsp cinnamon
-1/2 a lemon (juice)
-1 tbsp coconut oil
-smallest amount of water you can use to make mixture blend
(for topping)
-1 apple,sliced thinly for top garnish
Directions:
- mix all food processor ingredients in the processor until fine
- scoop it out into the pyrex dish and flatten (this will be the crust) *you can add more sliced apples on top of the crust before pouring the cream on if you prefer*
- blend all blender ingredients until mixture is creamy and smooth
- pour into pyrex dish on top of the bottom crust
- garnish top with thinly sliced apples and some cinnamon
- refrigerate for a few hours if you would like it to firm up a bit, or enjoy immediately!
Adapted from:
Original pics
Saturday, September 1, 2012
Tomato Veggie Casserole

Prep time: 15 min
Cook time: 50 min
Serves: 6

- 1 medium potato, peeled and cut into 1/2-inch pieces
- 1 medium yam, peeled and cut into 1/2-inch pieces
- 1 red bell pepper, seeded and cut into 1/2-inch pieces
- 2 carrots, peeled and cut into 1/2-inch pieces
- 5 tablespoons melted coconut oil
- 1 red onion, thinly sliced into rings
- 2 small or 1 large zucchini, cut crosswise into 1/4-inch-thick pieces
- Salt and pepper
- herbs de provence
- dried basil
- 2 large ripe tomatoes, cut crosswise into 1/4-inch thick slices
- 1cup grated Parmesan
- 4 tablespoons dried Italian-style bread crumbs
- Fresh basil sprigs, for garnish

Preheat the oven to 400 degrees F.
Mix the potato, yam, bell pepper, carrots in a 13 by 9 baking dish. We used a deep rectangle foil pan because we didn't have anything else. Drizzle 2 tablespoons of coconut oil. Sprinkle salt and pepper (we accidentally forgot this step!). Mix together with hands and spread the vegetables evenly over the bottom of the pan.
In a separate small bowl, stir together the Parmesan and bread crumbs. (We actually doubled this part, in the original recipe it was half of what we have written above in the ingredients list. Trust us on this one, the Parmesan and crumbs make it delicious!)
Sprinkle the Parm-crumb mix over the veggies. Drizzle with one last tablespoon of coconut oil.
Bake uncovered until the veggies are tender, and the topping is golden brown, about 50 min. Garnish with fresh basil. Enjoy!!!
We love this recipe and we are definitely going to make it again. We hope you enjoy it as much as we did! It only lasted two days for the both of us, but it was definitely worth it.
This post was written by Karel & Michael.
Adapted from:
Food Network
Subscribe to:
Posts (Atom)