
 DIY Sweatybands Tutorial
What you need: (I went to Joanns Fabrics)
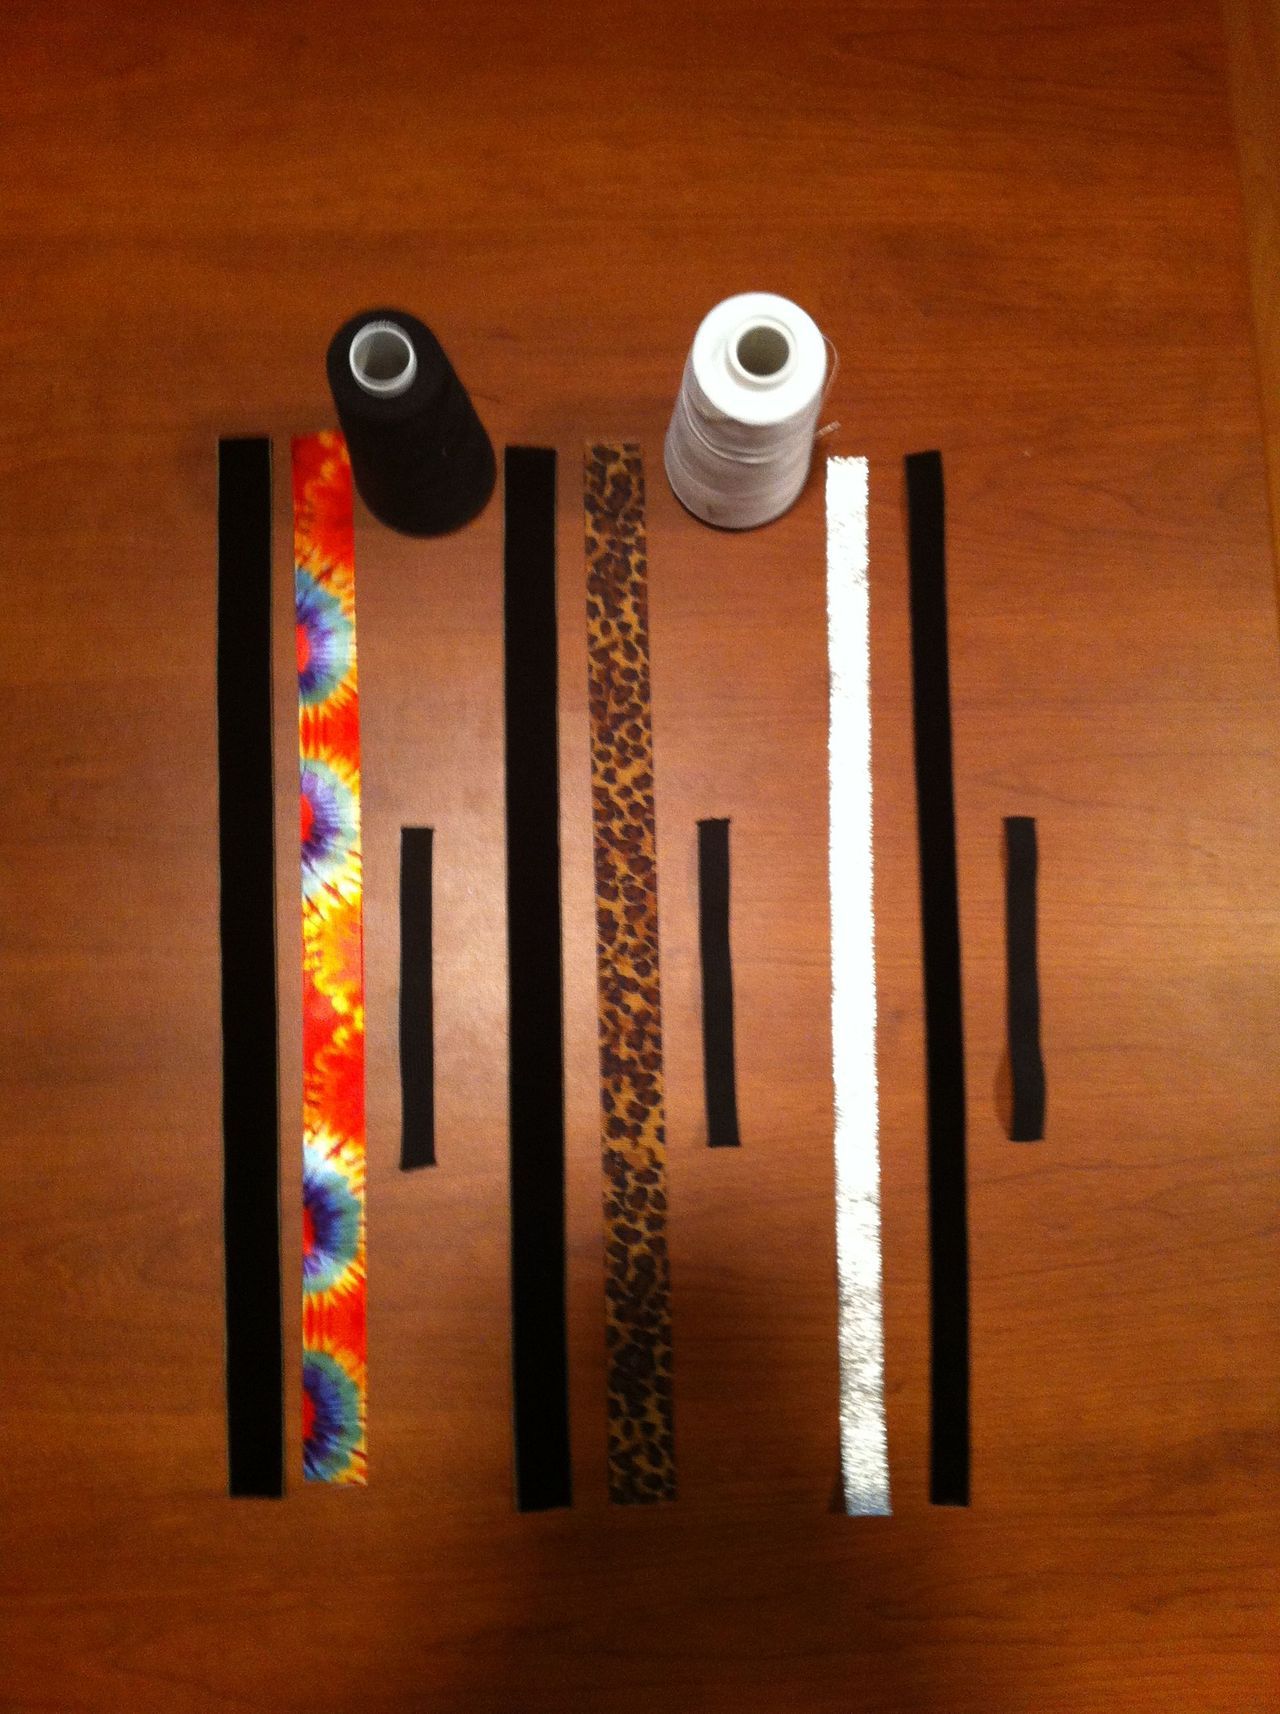
- 1/2” elastic (any size should be fine, I used 1/2” in black)
- ribbon (I got three different sizes and patterns)
- velvet ribbon (make sure these are the same size as your ribbon)
- needle and thread (I used black and my machine)
Steps
- Measure your head and cut your ribbons smaller than that. I cut to where under my ears are (I cut at 16”). Cut the velvet ribbon exactly the same. Cut elastic. (All my headbands ended up all different sizes for some reason, but I found 6 1/2” for the elastic is good).
- Make sure the pattern side is up on ribbon and flip over.
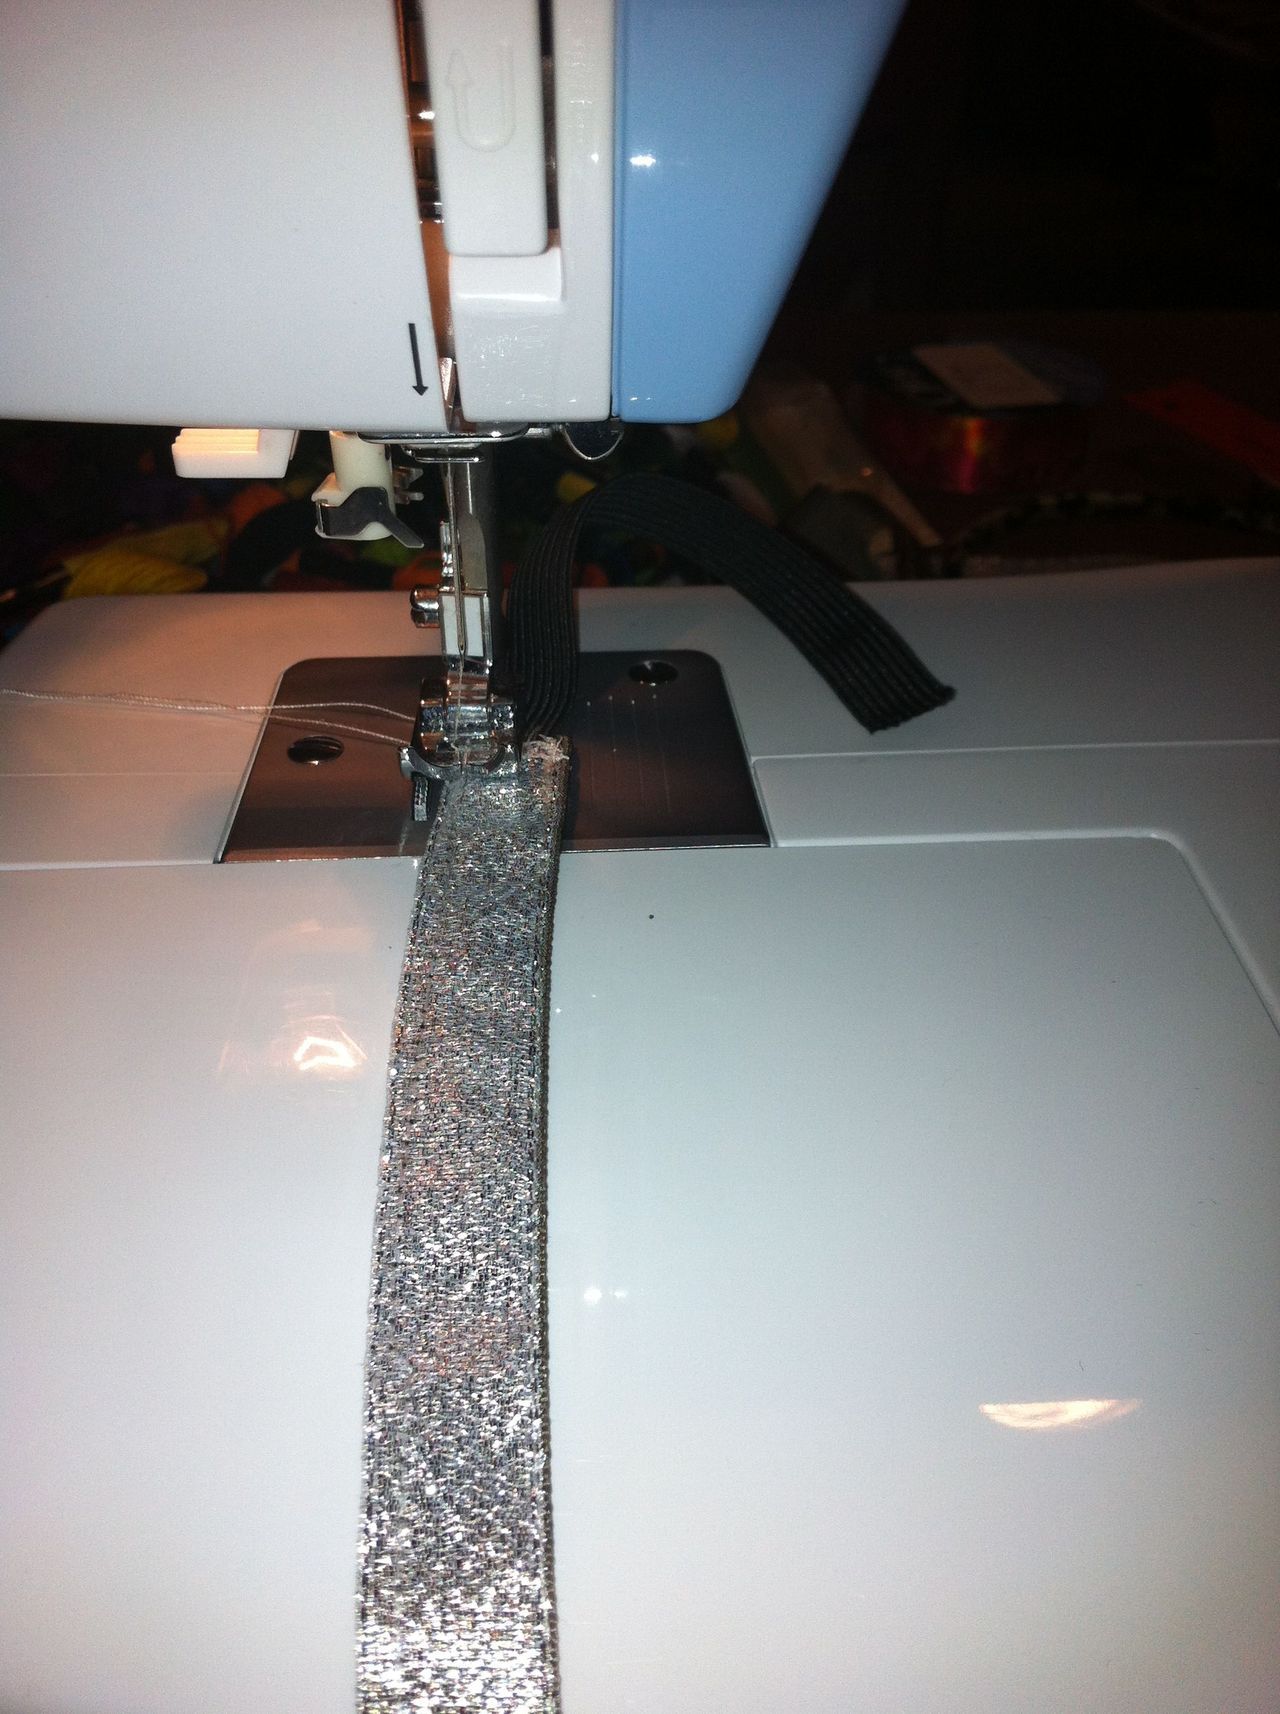
- Put fuzzy side up of the velvet ribbon on top of your headband ribbon. (So it looks like you’re going to wear it.
- Sew one side (the long side!) close to the edge. Flip to the other long side and sew that.
- Slip in elastic between the two ribbons and stitch like crazy! That way it’s secure.
- Slip in other side. BAM you’re done!
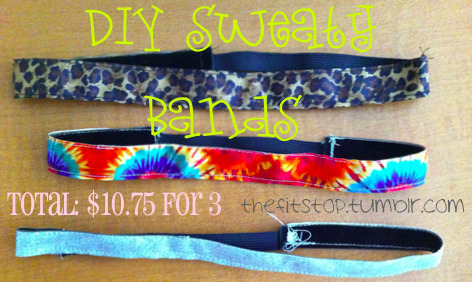
I made 3 DIY sweatybands for $10.75 which comes down to about $3.58 for one. Better than $15 right?!
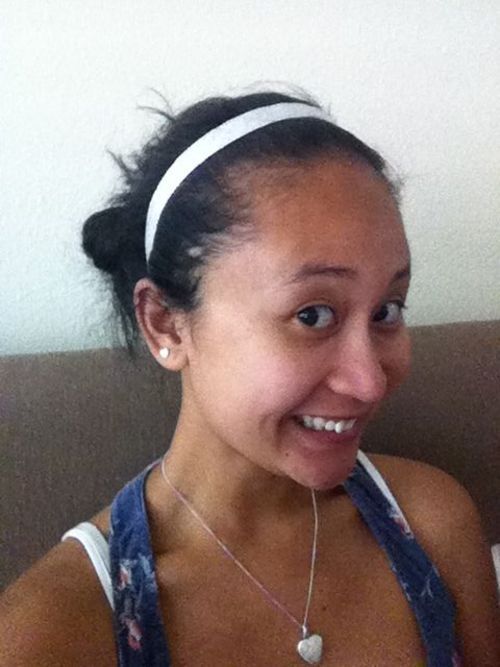
I hope the pictures helped in some way. The banner is the finished product. #1 is the measurements. #2 is to show how I stictched it. #3 is me wearing the final product. I had worn this all day and it didn’t move! The velvet ribbon keeps the headband stay in place.
If you have any questions, feel free to leave a comment or email us! (: Happy DIY-ing!
This post is written by Karel.
Adapted from:
Sweatybands

No comments:
Post a Comment
Note: Only a member of this blog may post a comment.